
Preface: Fayaway is presently at anchor near Thunderball in the archipelago of Exumas, Bahamas, attending a cruisers’ rally. More about that later. If you continue reading below, you will backtrack with us to almost two years prior, as we were deep into the refurbishment of our “new” Fayaway in the Spring of 2021. Enjoy!
Fayaway’s high-quality original standing (and running) rig and spars were only used for ten years, but then sat horizontal for another fifteen years uncovered on a rack, becoming an ideal growth environment for lichen and moss. Threaded fittings, slots, bearings and crevices amongst the furlers and winches had filled with atmospheric dirt, clotted by many seasons of snow, rain, pollution and pollen. Let the refurbishment begin!
The easy part for me was climbing high onto the rack, labeling and carefully removing and coiling dozens of individual lines, shrouds, turnbuckles and stays. One by one, I passed each down to Kelly who coiled them and dragged them over to our little Subaru. We dropped everything off at a rigger’s shop in nearby Newhaven. Since we were deep in the pre-vaccination covid pandemic, I could only communicate via telephone and email, and leave the massive pile out by their drop box.

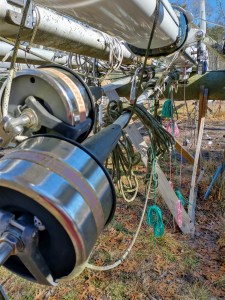
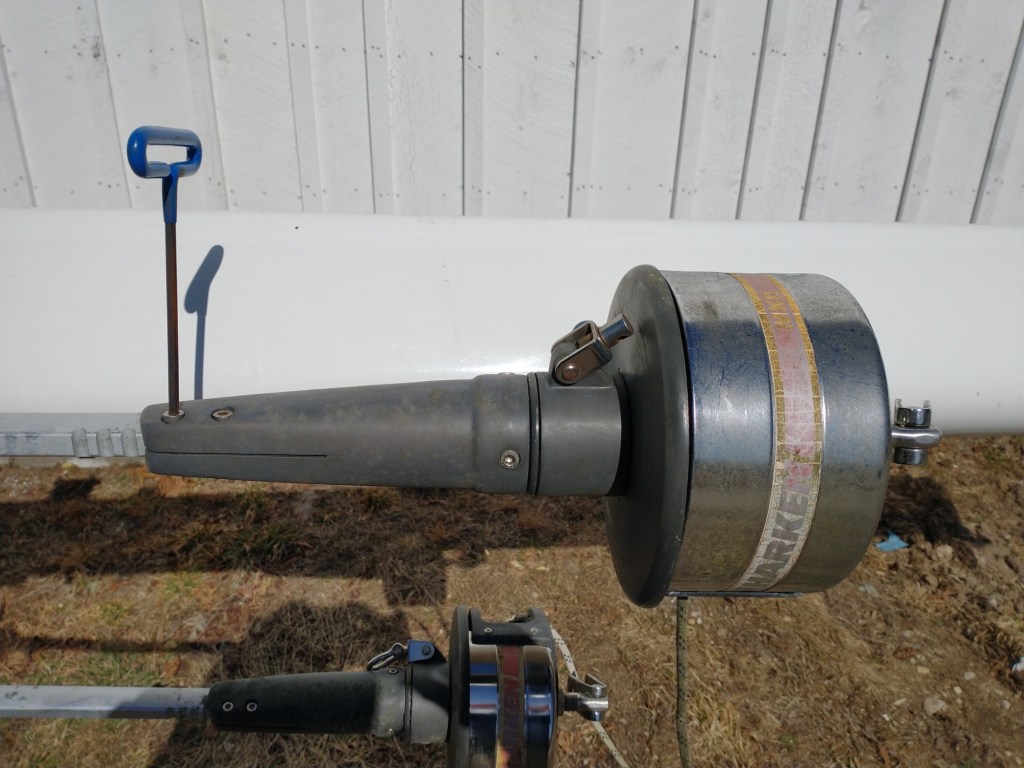
But the two furling headstays were a different animal, each surrounded by long aluminum extrusions, and mysteriously complicated drum, bearings and several minuscule pieces, and also covered with dirt and growth high above the weeds. I was afraid to disassemble the furling mechanism and hoped that a generous rigger would come to me with his swaging machine and priceless tribal knowledge. Did we need any other specialized tools to replace the inner wire? (I was trying to make excuses.) Climbing onto the rack, what if I dropped one of those itty bitty screws or plastic guides into the tick-filled weeds below?
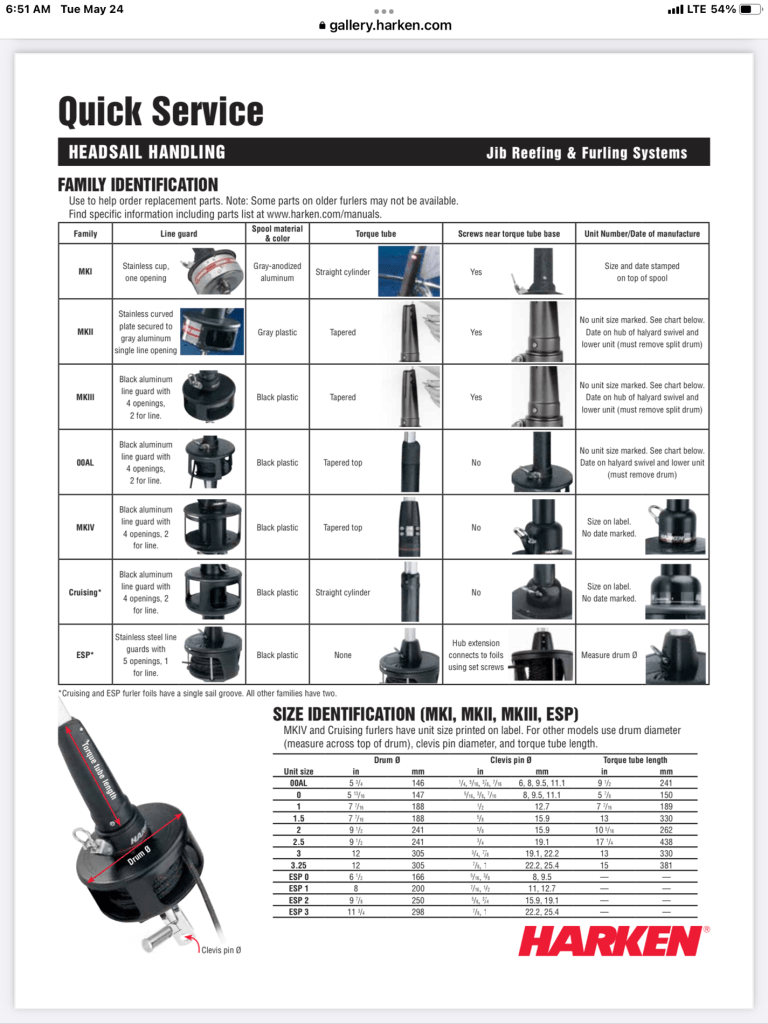
Only finding sparse and conflicting information on the Internet piqued my anxiety. For example, I discovered that not all Harken MKII furlers have turnbuckles for adjustment. (Ours did not, so how is it adjusted?) One experienced rigger tried to placate over the phone – “it’s simple, what’s your problem?” With launch season approaching, and encouragement from Harken’s technical telephone support (who provided the proper MKII manual for my particular furler) we took a collective deep breath and set about the task.

Taking pity on me, the kindly boatyard guys moved our heavy mast from higher up on a big rack to a lower, more convenient location where we could work on it at waist level. Being originally swaged at both ends, I painstakingly removed the furler drum assemblies by digging out the dirt and old excess thread locking compound and unscrewing all the tiny screws.
Then with a hacksaw cut off the old stainless steel wire at one end (so it could be slid from the foils). Back at his shop, the rigger measured and cut new wires, extra long, and swaged only the upper end before sending all wires (old and new) back to us. (The whole interaction was really strange – swapping parts and large coils of heavy wire via a drop-box outside the front door.)
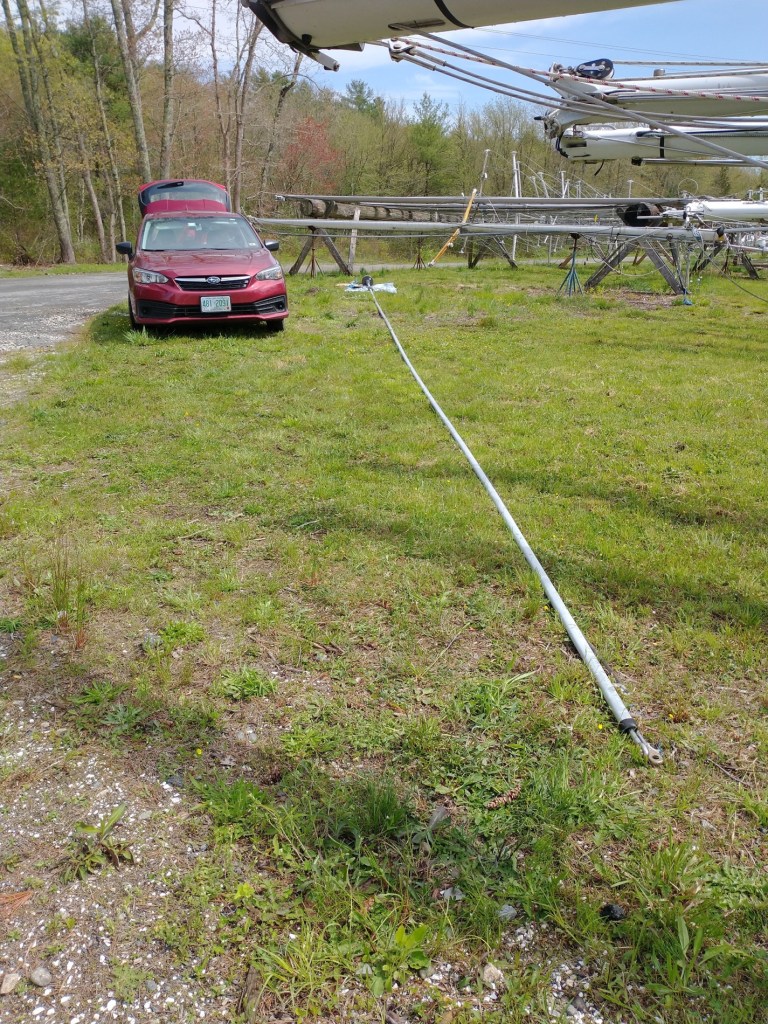
First we carefully laid out the complete foil assembly, side-by-side, old and new wires on a “flat” surface, for length comparison and pre-check to ensure we had all the bits. Since we’re out in a tick-infested field with long grass, I laid down an old blanket and wrapped a thin bit of tape over the new raw wire end. Working together we carefully slid the raw end of the shiny wire down through a narrow slot inside the foils, beginning at the upper end. With Kelly pushing the new wire gently, I held (above the grass) and walked down the entire length of foils at the same speed, slightly lifting and jiggling at the joints a bit, helping the wire end to pass through each section. This part of the process took only about three minutes at most. Phew!
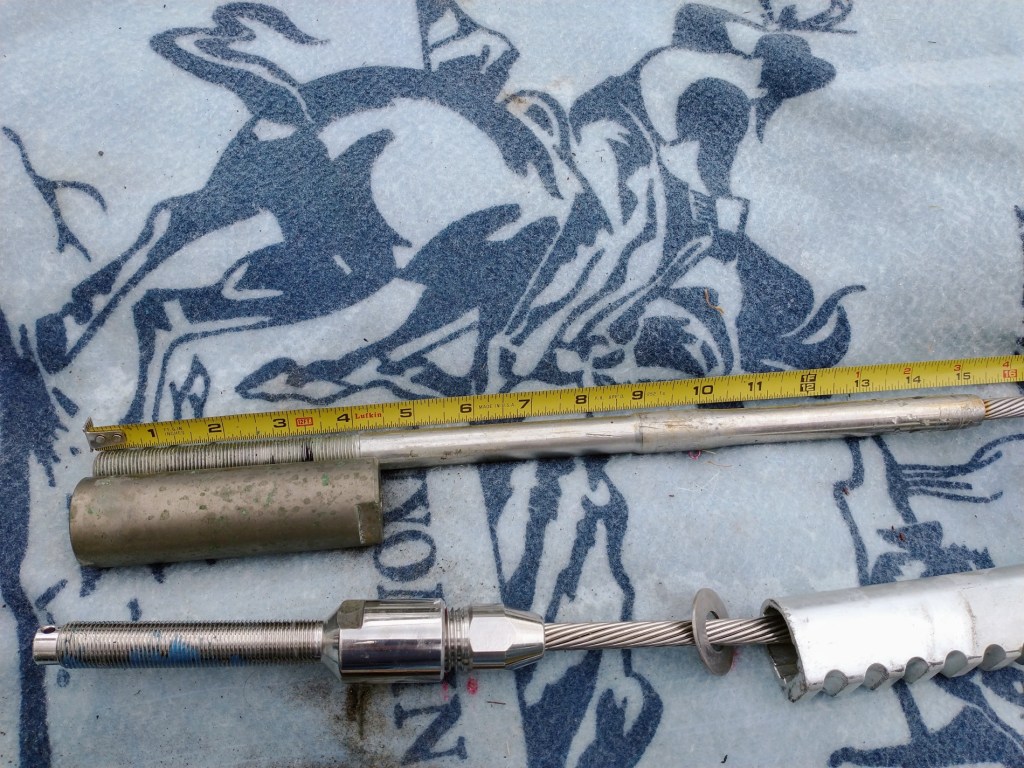
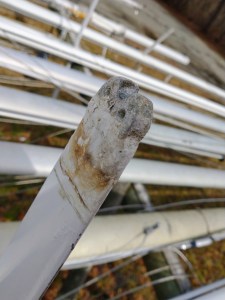
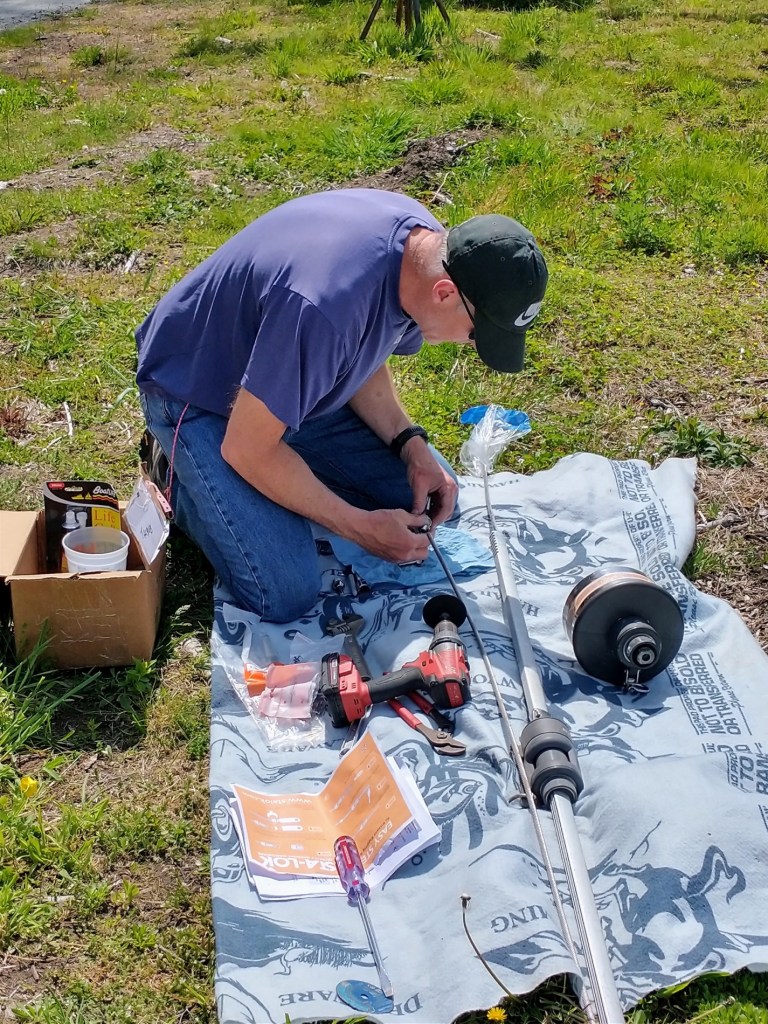
Adjusting length to allow for a new Stalok adapter (before there was none) at the lower end, I cut the wire cleanly and made-up the new fittings. Then I adjusted the Harken threaded mechanism (to prior Sharpie pen markings made during disassembly). After checking the final length twice more, (and studying Harken’s instructions several more times) I re-assembled the drum, torque tube and upper swivel using the original screws and Loctite, a thread-locking compound. But what about that missing torque-tube screw!? (Anxiety lingers…)
Repeat for inner staysail furler. Less anxiety now!
Then onto rewiring lights, antenna, wind indicator, and radar. There’s a lot of stuff on our mast! (Captured in a previous post. See link).
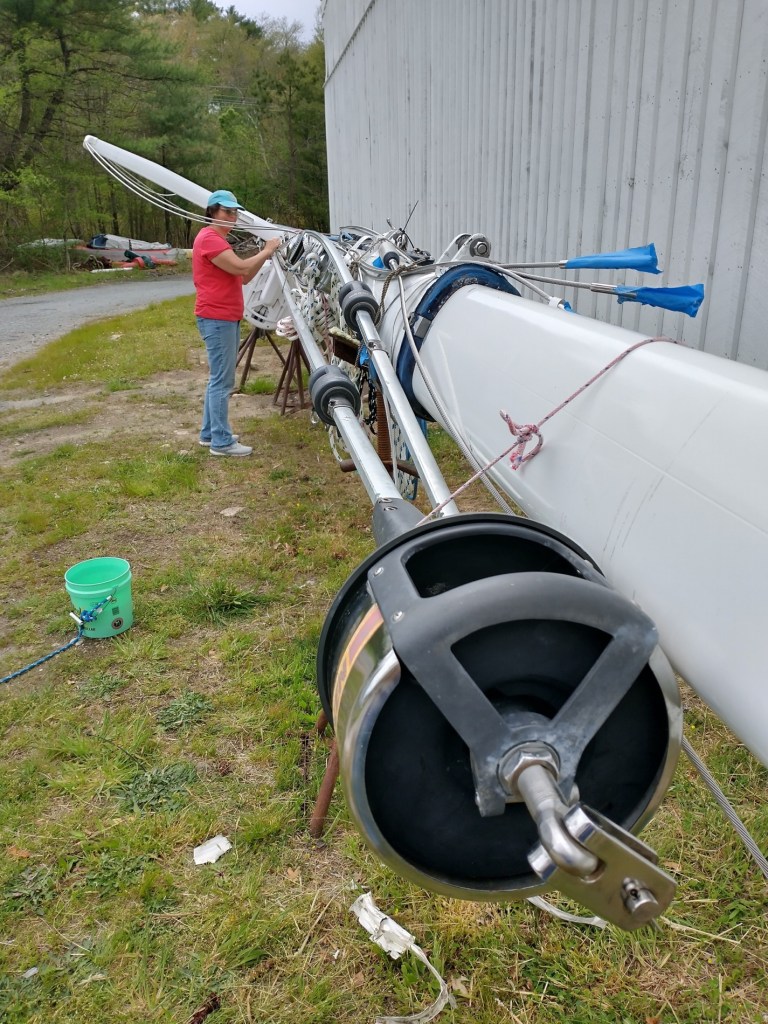
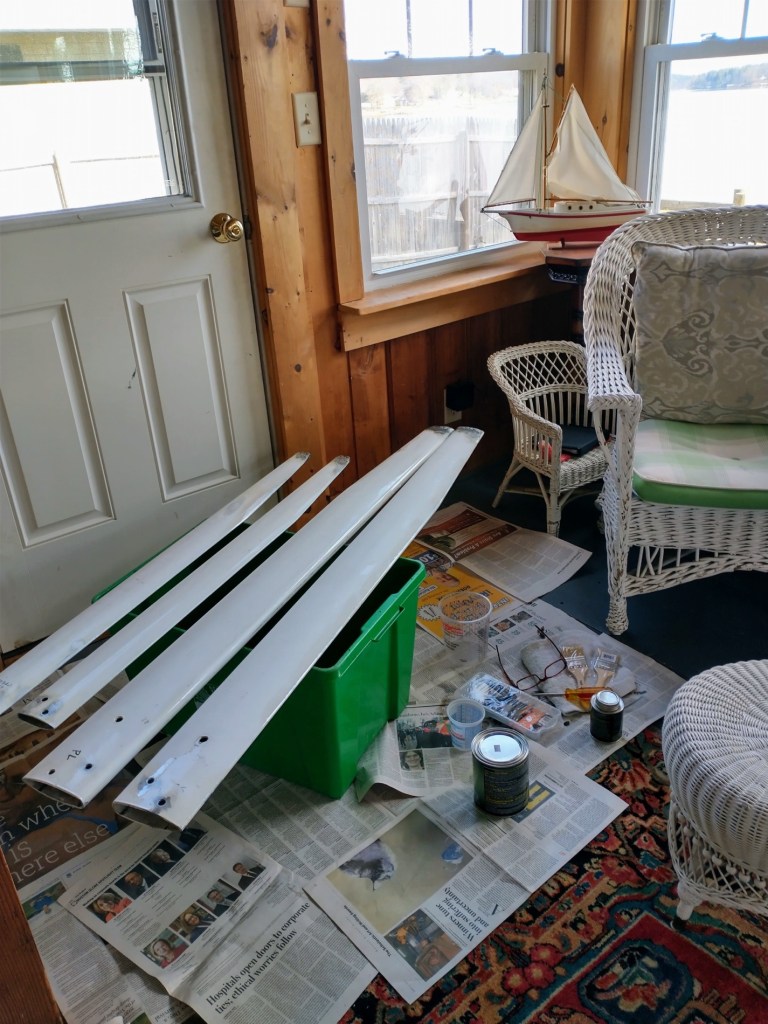
As seen during disassembly, we noticed many areas on the spreaders had corroded, and were heavily pitted, especially where stainless steel screws and wire were pressed together. A drill-mounted wire brush, sandpaper and special paints solved this issue back in our living room.

We sailed quite a few miles thereafter without incident. With the initial winter over, I checked it all again before re-stepping. Months later I ordered that single missing screw from Harken, and installed before heading south and offshore again.

You’ve brought her a long way since those early days. Fayaway is the better for having you two as her homeowners
LikeLiked by 1 person
I was laughing with you and your anxiety while reading this, knowing your penchant for precision and over-engineering would result in a happy ending.
LikeLiked by 1 person
Seriously! I researched and then procrastinated for as long as possible to perform that last part of the project. Eventually we had to take the plunge.
LikeLike